

Introduction
About Google Forms
Google Forms is an online form creation tool. Easily create and share online forms and surveys, and analyze responses in real time.
Check Google Forms official websiteAbout HookNotifier
Hook.Notifier is a notification collector, it allows you to send, store and organize useful notifications on your phone from various services.
Check Hook.Notifier official websiteReceive notifications from a Google Forms
Objective
This guide aims to allow you to receive notifications when a user fills out one of your forms. The goal is to receive a notification in your Hook.Notifier interface, on your phone and on the web interface, containing all the answers filled by the user. Of course, other uses are possible, don't hesitate to take liberties.
Setting up a script for our form
Google Form offers the possibility to execute a script according to certain events taking place when a user fills our form. It is this script that will allow us to play with Hook.Notifier.
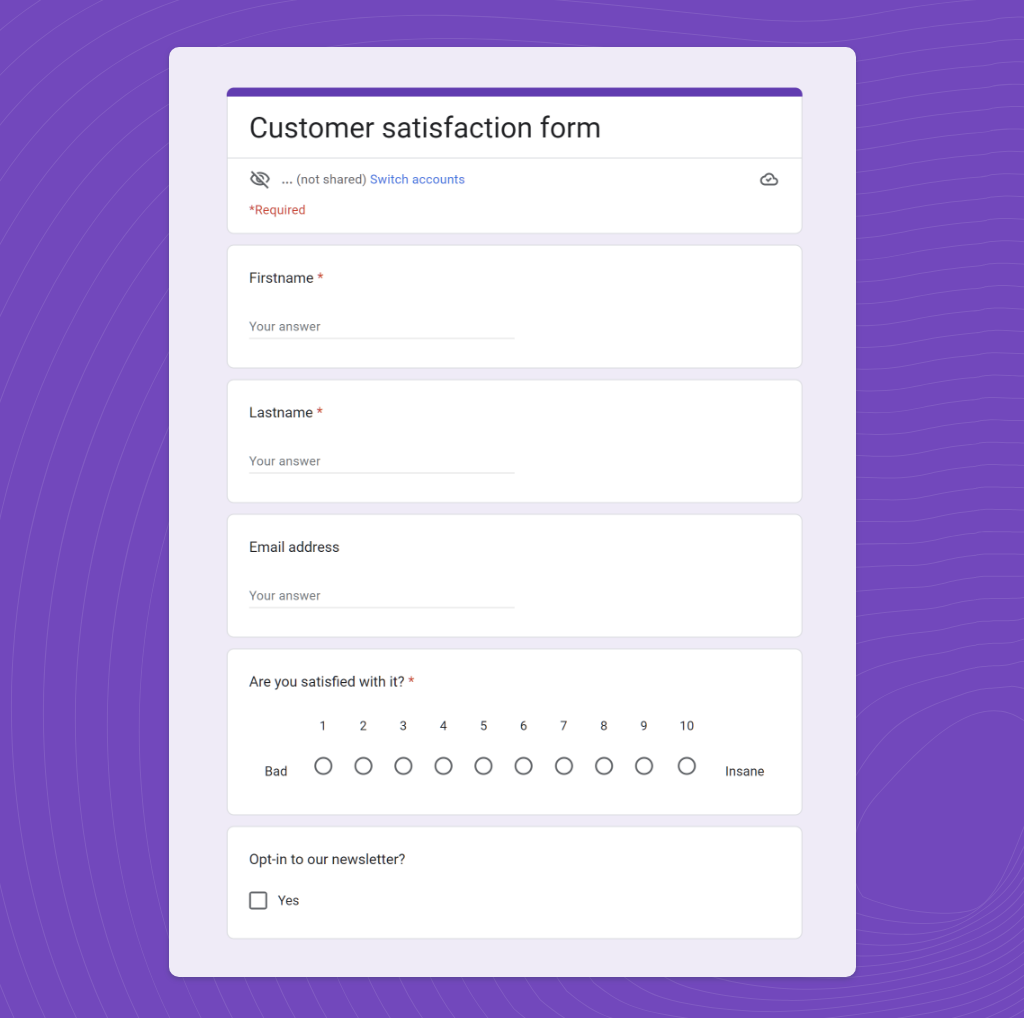
1. Form creation
We are not going to detail how to create your form, Google does it much better than we do. In our case, we made a simple satisfaction form to get the name, the first name, the email and a rating representing the users' opinion of one of my services. Once you are happy with your form, we can get down to business.
2. Start the script editor
Next to the send button, click on the fly-out menu and choose Script editor. A new "Apps Script" window will open, this is where we will enter our script. We have made you a ready to use script.
[[javascript]]function sendToHookNotifier() {
  const form = FormApp.getActiveForm();
  const formResponses = form.getResponses();
  const responsesFormated = {};

  for (let i = 0; i < formResponses.length; i++) {
    const formResponse = formResponses[i];
    const itemResponses = formResponse.getItemResponses();
    for (let j = 0; j < itemResponses.length; j++) {
      const itemResponse = itemResponses[j];
      responsesFormated[itemResponse.getItem().getTitle()] = itemResponse.getResponse()
    }
  }

  const identifier = "%_YOUR_IDENTIFIER_%";
  const key = "%_YOUR_KEY_%";

  const object = "Someone%20submitted%20your%20form";
  const body = `From%20your%20form%3A%20%22${encodeURI(form.getTitle())}%22`;
  const color = "%23673ab7";

  UrlFetchApp.fetch(
    `https://sun.hooknotifier.com/api/notifications/${identifier}/${key}?object=${object}&body=${body}&color=${color}`,
    {
      method: 'post',
      payload: responsesFormated
    }
  );
}
Copy this code snippet and paste it into the window to replace the existing code snippet. You just have to replace your %_YOUR_IDENTIFIER_% and %_YOUR_KEY_%. All other parameters are optional, but if you want to customize your notifications, we refer you to our Get Started article.
Get started with Hook.Notifier
This article aims to introduce you to Hook.Notifier, including its benefits, recommended introductory articles, and developer documentation.
Remember to save, and give your document a name, we call it Hook.Notifier on our side.
3. Trigger configuration & testing
Now we just have to configure our trigger to make the script run when a user is present. On your left, click on the "Triggers" menu and then on the "Add Trigger" button.
Select your function, we have to change the type of event to "On form submit", and that's it, we'll receive our notifications.
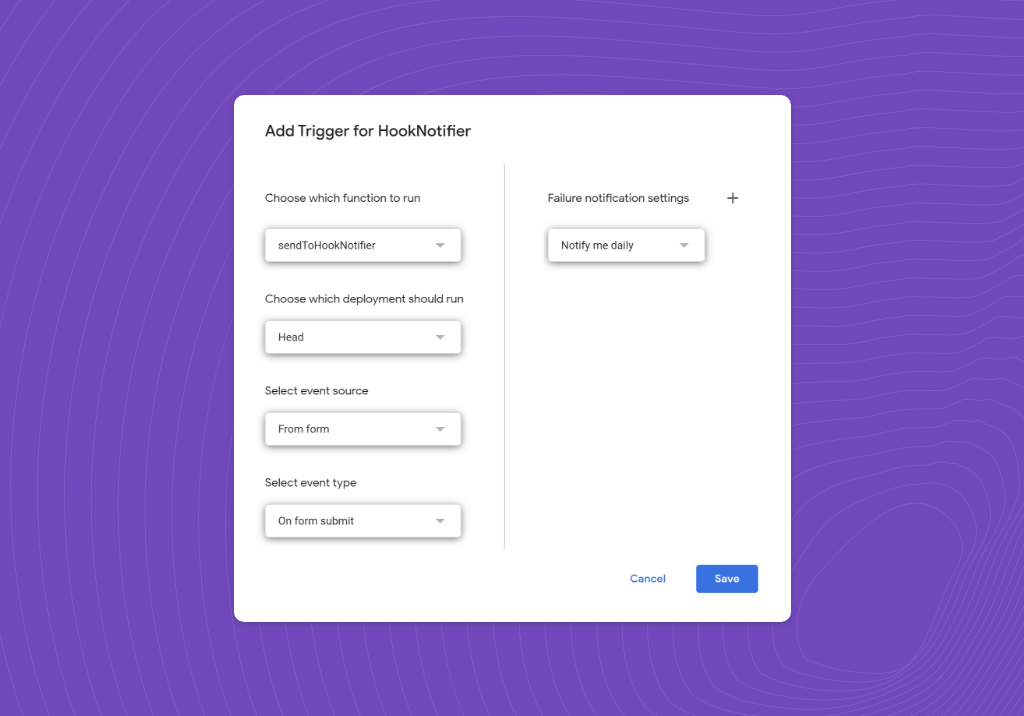
Apps Script does not have access rights to your Google Forms, it will ask you for permission. Follow Google's instructions to authorize it. This screen can be scary, but don't worry, you are the developer, Google is just warning you. Click on "Advanced" and "Go to your script name", then authorize your script to access your forms.
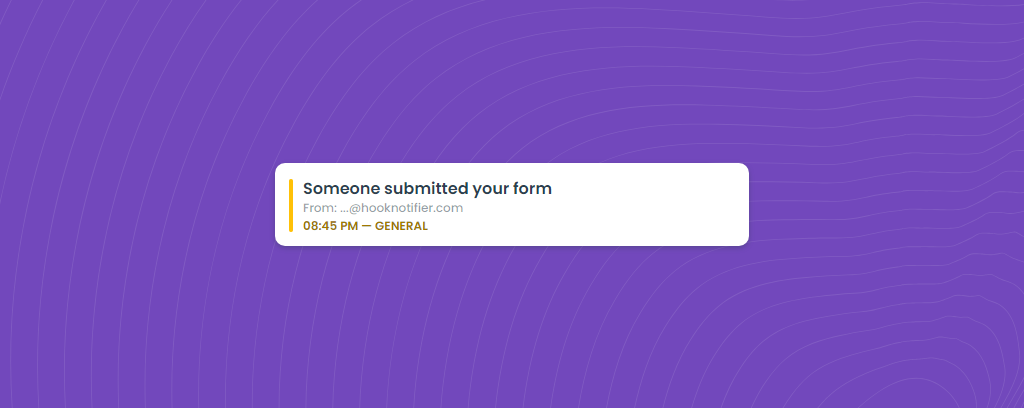
Now all we have to do is test. Try filling in your form and let the magic happen.
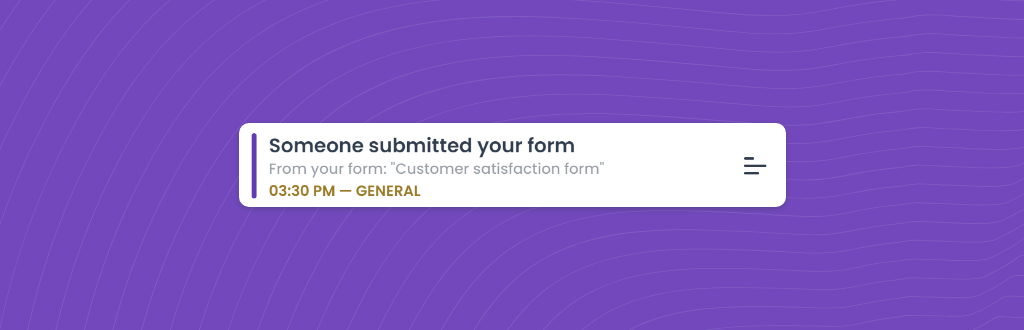
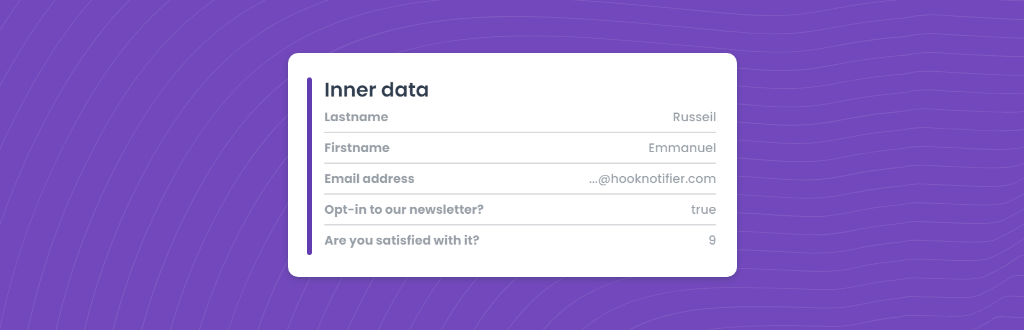
Even crazier, by clicking on the notification, we can see all the information submitted.
Bonus. Extras options
Many options are customizable, but in this case, we can think of adding a redirect url allowing to reach by clicking on the notification the Google results of our form. To add this redirection, edit your script to add the parameter redirectUrl.
[[javascript]]...
  const object = "Someone%20submitted%20your%20form";
  const body = `From%20your%20form%3A%20%22${encodeURI(form.getTitle())}%22`;
  const color = "%23673ab7";

  const redirectUrl = "%_YOUR_FORM_URL_%";

  UrlFetchApp.fetch(
    `https://sun.hooknotifier.com/api/notifications/${identifier}/${key}?object=${object}&body=${body}&color=${color}&redirectUrl=${redirectUrl}`,
    {
      method: 'post',
      payload: responsesFormated
    }
  );
...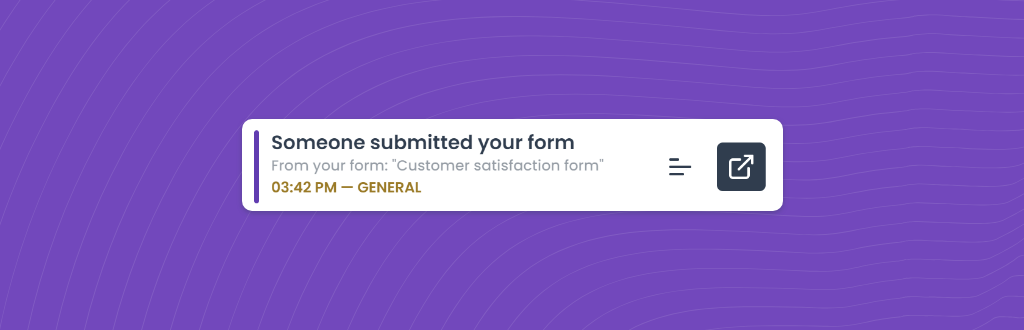
The notification now has a button to redirect you to the results of your Google Form!
No-code by Zapier
Everything we have seen above can be done without any code thanks to Zapier. However, depending on your usage, a paid account with Zapier may be required.
A quick note about Zapier, we won't go into all the integration parameters. Please refer directly to the article about Zapier to know everything about Zapier and Hook.Notifier.
Receive push notifications on your phone from Zapier
Zapier is Hook.Notifier's best ally, an amazing way to receive notifications from thousands of services without having to write a single line of code. It's accessible, user-friendly and the possibilities are endless.
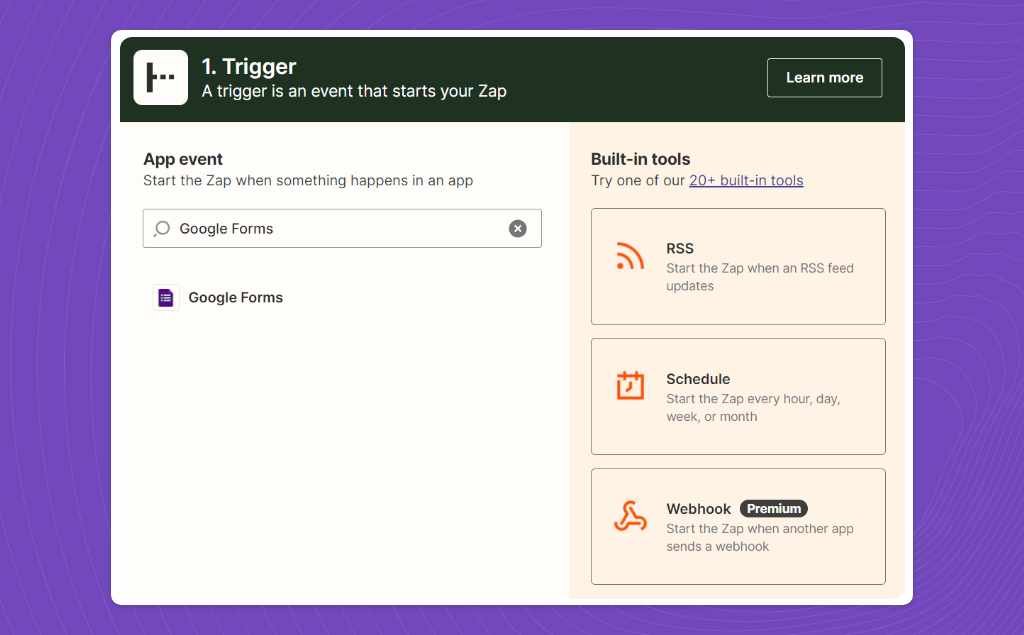
1. Trigger creation
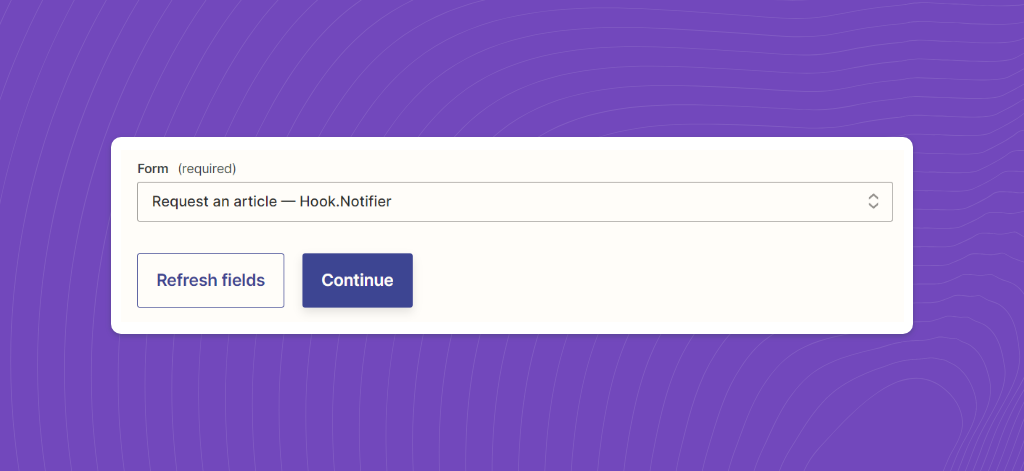
Once your zap is created, set up a Trigger. Search and select "Google Forms" in the list of applications.
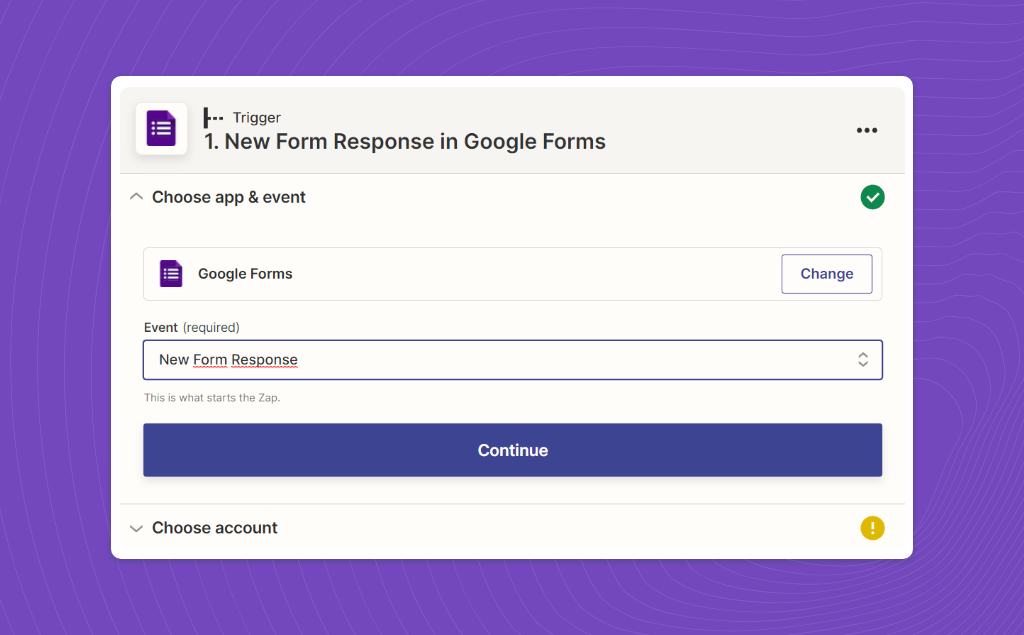
Then select the event you are interested in. In our case, we want to send us a notification when a form entry is submitted, so we choose the Google Form event "New Form Response".
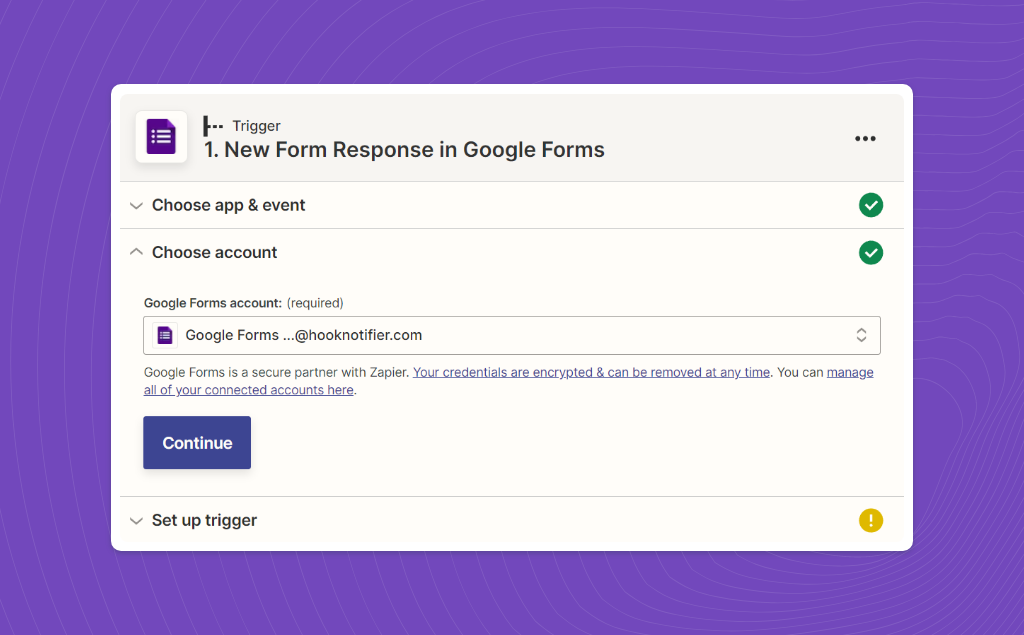
Once selected, you can proceed to the account selection step. Zapier will need to access your forms and therefore connect to Google Form. Follow its instructions and connect with the Google account that contains your forms.
Once logged in, you should be able to select the form for which you want to receive notifications on your Hook.Notifier.
2. Action configuration
In the Zapier application selection form, search for "Hook.Notifier" and select it.

In the choice of events, only one is available, so choose "Send Notification".

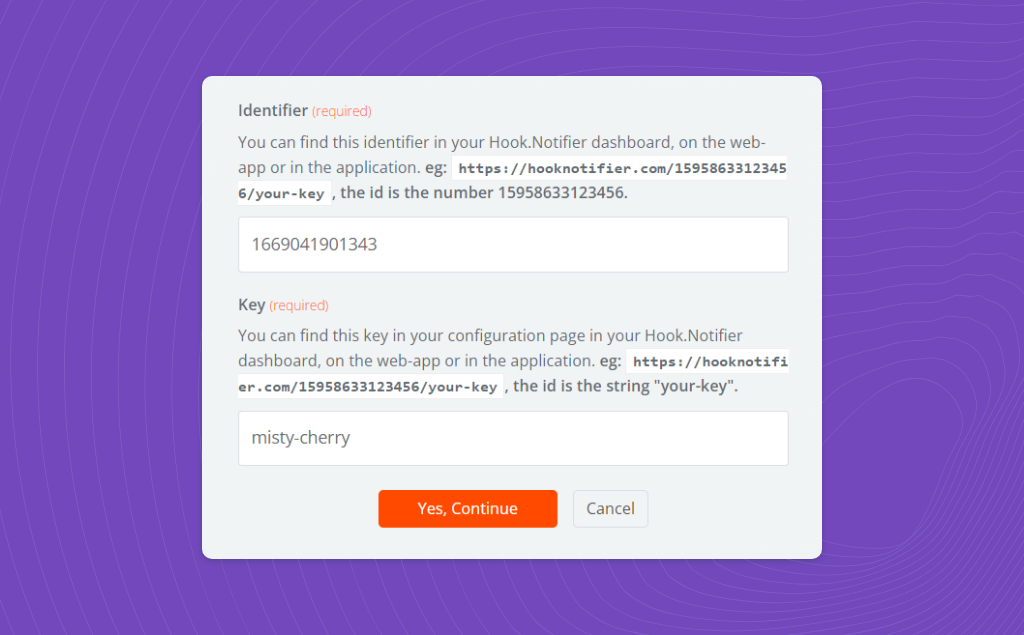
We will now proceed to the Hook.Notifier connection step. The application will ask you for your identifier: %_YOUR_IDENTIFIER_% and your key: %_YOUR_KEY_% that you can find in your Hook.Notifier account.
Once your identifiers are filled in, test their correct operation. You can now proceed to the notification configuration, we refer you to the article dedicated to Zapier for the details of this configuration. Don't forget that in the filled fields you can integrate values from your Google Form.

3. Finalizing your zap
Once configured, go to the test step, you should receive a notification!
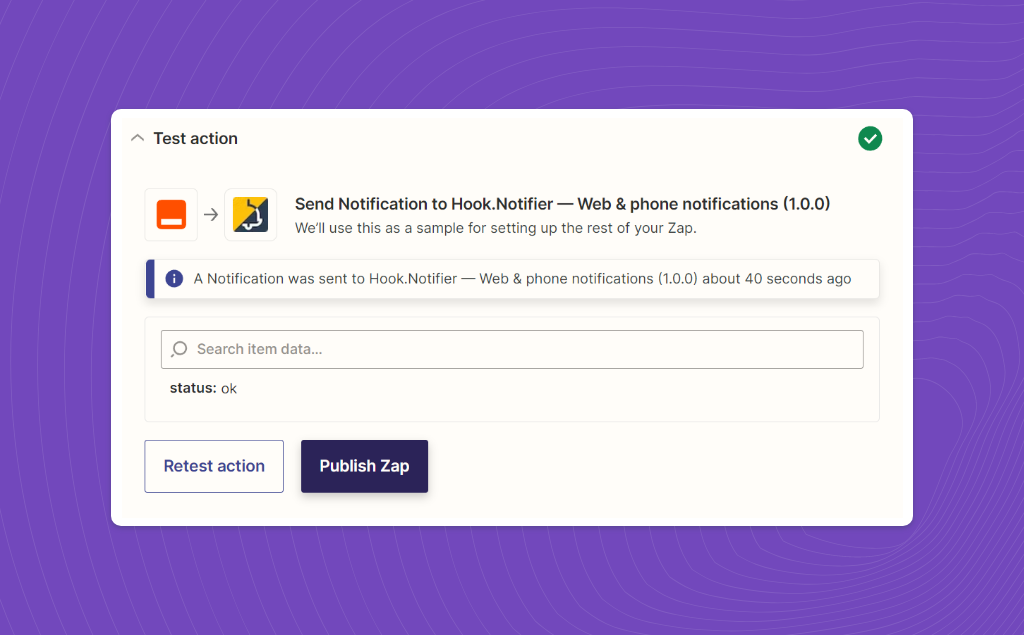
That's it, you just have to publish your Zap and enjoy your notifications.
Conclusion
You should now be able to receive your notifications from Google Forms; many parameters are missing in this article, we encourage you to dig into our other guides to customize your notifications.

If you like this article, feel free to connect with us on Twitter.
If you have any questions or special requests, such as needing clarification on the terms discussed in this article, more information on a specific part, or additional articles and tutorials, please feel free to provide feedback through the widget below.